Configuration
There are four methods for managing the configuration of the Veva III.
- Inzwa Cloud using the Manage Devices screen.
- Connecting to the USB port with a terminal emulator.
- Uploading a configuration file to the FTP server.
- Inzwa's over-the-air configuration (OTAC) API.
- Utilizing MQTT to configure the Veva III.
Configuration using Inzwa Cloud
Inzwa Cloud is the easiest way to manage the Veva III. Please refer to the Manage Devices section for details.
Configuration using a terminal emulator
Most terminal emulators should be sufficient for managing the configuration of the Veva III. The following configuration steps are illustrated using TeraTerm.
- If you don't have a terminal emulator, download and install one. TeraTerm is one available option.
- Connect the Veva III to your computer using the USB cable.
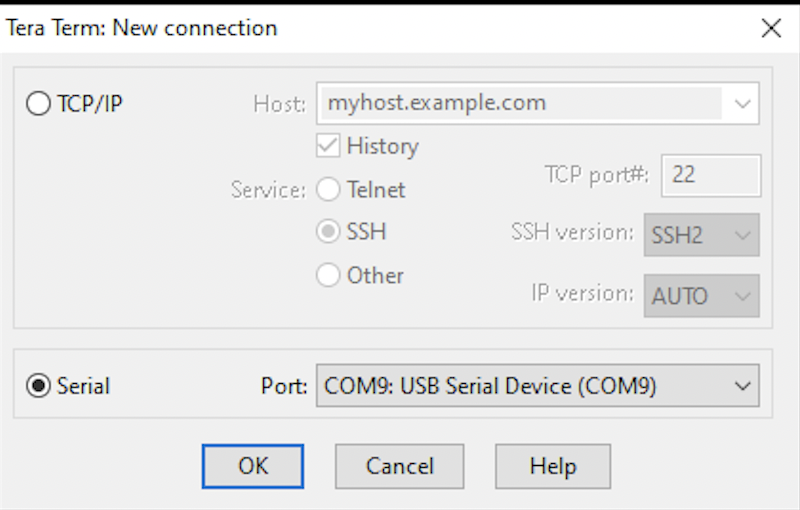
- Once your terminal emulator is open, start a new connection by setting it to communicate with the USB serial port.
Your COM port number (eg. COM9), will differ from the examples.
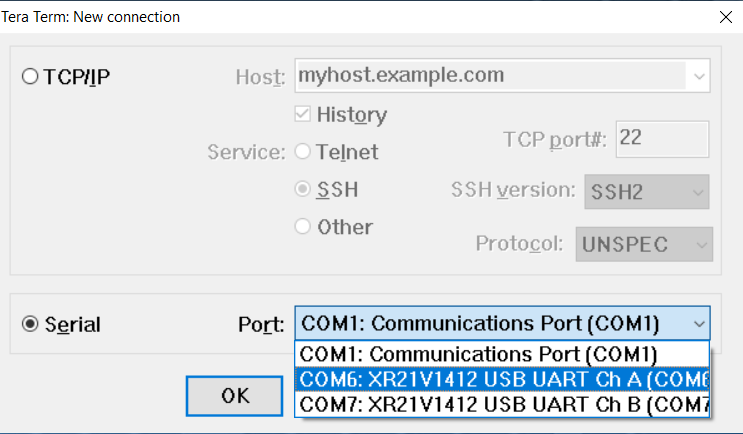
Installing the USB serial device driver (Veva 3/3-02/3-03 models only)
If the XR21V1412 USB UART Ch A port is not available in your terminal emulator, you may need to install a driver.
- Download the XR21V1412 driver for Windows.
- Unzip the downloaded file.
- In the EXE directory, run the installer
xrusbser_ver2200_installer.EXE, following the system prompts. Your system may require a reboot at the end of the installation process.
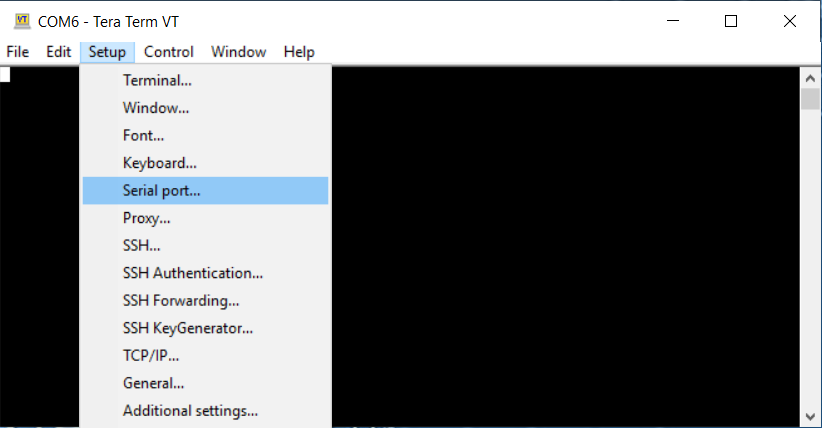
- Go to your serial port connection configuration.
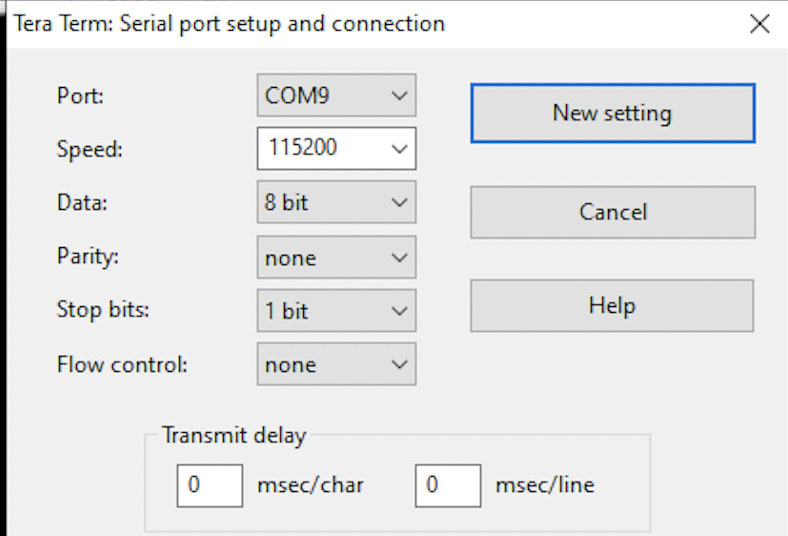
- Set your serial connection to the parameters shown.

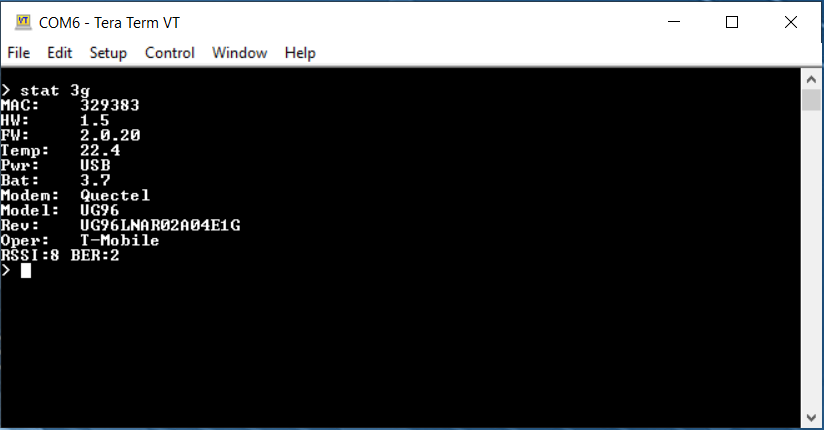
- In the terminal window, press the return key. If configured correctly, a carat prompt should appear.

- Type a Veva III command, then press the return key to see the response. See the Command Reference section for available commands.
Uploading a configuration file to the FTP server
The Veva III utilizes an INI file format for its configuration file. The configuration parameters follow a syntax similar to the command set.
We recommend you review the Veva III command set as well as the Veva III Sample Configuration File to become familiar with its structure and syntax.
To update the Veva III's configuration by uploading a file to the FTP server, follow these steps.
- Connect to the FTP server managing files for your device. If you're using Inzwa's FTP service, your organization should have been provided login credentials.
- Navigate to the CONFIG folder where you should find a file named with the device's serial number and a .config suffix (e.g. abc123.config).
- Download the file and use your favorite text editor to make changes.
- Save the new configuration file substituting the .new suffix for .config.
- Upload the new configuration file to the CONFIG directory the FTP server.
- If the CHECK_CFG flag is set to true, the device will automatically download the configuration file the next time it uploads a scheduled PPV histogram file. Otherwise, command the device to download the new configuration file with the CFG DOWNLOAD command using the terminal emulator, the OTAC API, or via text message.
- In the event of an error, the Veva III will rename the new configuration file with a .new.bad suffix.
If connected to the Veva III using a terminal emulator, you can watch the upload/download process by turning logging on and setting an appropriate log level. See the logging commands for more information.
Triggering the Veva III to upload/download configuration files by text message requires special configuration and may not be available.
Veva III OTAC API
If Inzwa provides cellular service for your Veva III, it may be possible to use the OTAC API to configure the device. Please check with Inzwa to see if this service is available. Refer to OTAC API for details on using the OTAC API.
Utilizing MQTT to configure the Veva III
MQTT is available on all Veva III - E01 and W01 devices. Your device may already be configured to use MQTT, so please check with Inzwa. If not, you may configure the device to connect with an MQTT broker using one of the other configuration methods mentioned above. See the MQTT commands for more information on configuring MQTT. Once configured, all commands described in the Command Reference section can be used to configure your Veva III.